Getting started with TheAccessiblePDF
This walks through converting your first document end to end. Your first 10 pages are free, so you can try a real conversion before paying (the standard rate is $1/page, less at volume).
1. Sign in
Go to pdf.theaccessible.org and sign in with Google, LinkedIn, or an email magic link. No credit card is required to start.
2. Upload a document
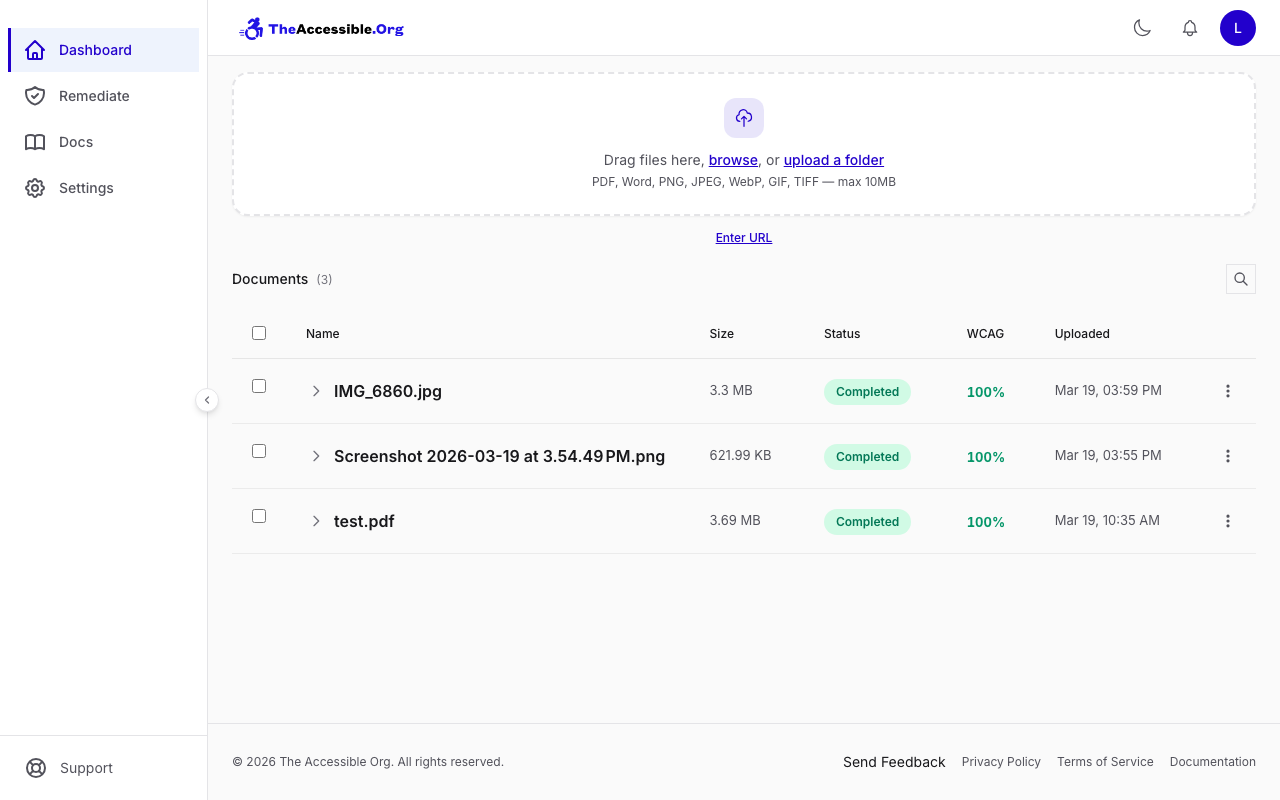
You can add files four ways:
- Drag and drop onto the upload area, or Browse to pick files.
- Folder upload — add every supported file in a folder at once.
- Fetch from a URL — paste a direct
https://…link to a PDF. - Convert by email — send a PDF as an attachment without signing in.
Supported formats: PDF, DOCX, PNG, JPEG, WebP, GIF, TIFF, up to 10 MB per file and 50 files per batch.
3. Let it convert
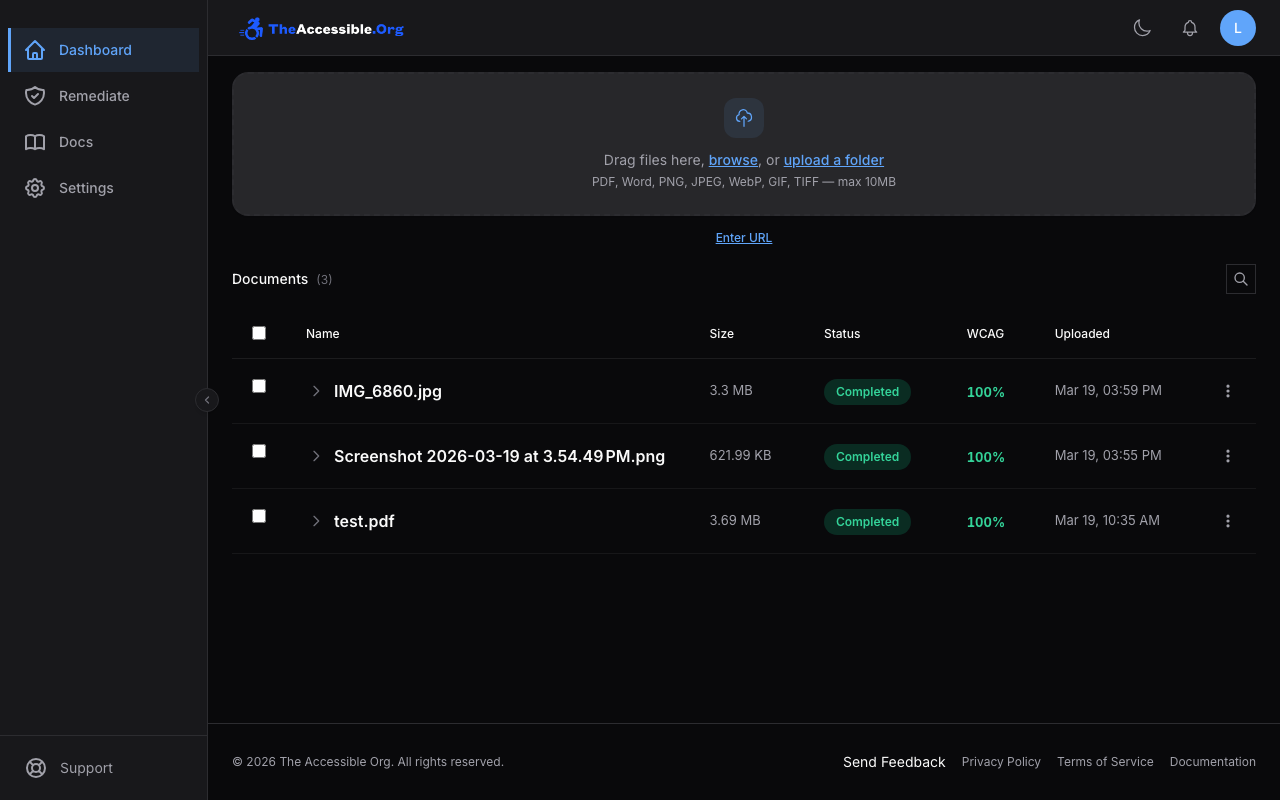
Conversion starts automatically on upload (you can turn this off in settings and start each file manually). The service analyzes the document, repairs accessibility issues against WCAG 2.1 AA, and produces an accessibility score from 0–100%. A credit is charged per page when the conversion completes.
4. Download your results
When a file finishes, open it to download:
- Accessible HTML — the main output, tagged with a WCAG AA badge when it reaches 100%.
- Accessible PDF — a tagged PDF (when available for that document).
- Conformance report (HTML) — a VPAT/ACR-style report you can share as proof.
- Original — your uploaded file.


Use Compare to view the converted HTML side by side with the original (needs a screen at least 1024px wide).
5. Edit and re-check (optional)
Open the document to edit the HTML in a visual or code editor. About three seconds after you stop typing, the accessibility panel re-checks the document for free. Saving keeps a version-history snapshot.
6. Share
Generate a public shareable link to the accessible HTML, or publish it in your LMS or website. To auto-convert PDFs at volume, connect an S3 bucket or install the Canvas scanner.